
New Design Workflow (Send to Digitizer)
When you’re working on a new embroidery design that doesn’t exist yet in SV, here’s how to handle it:
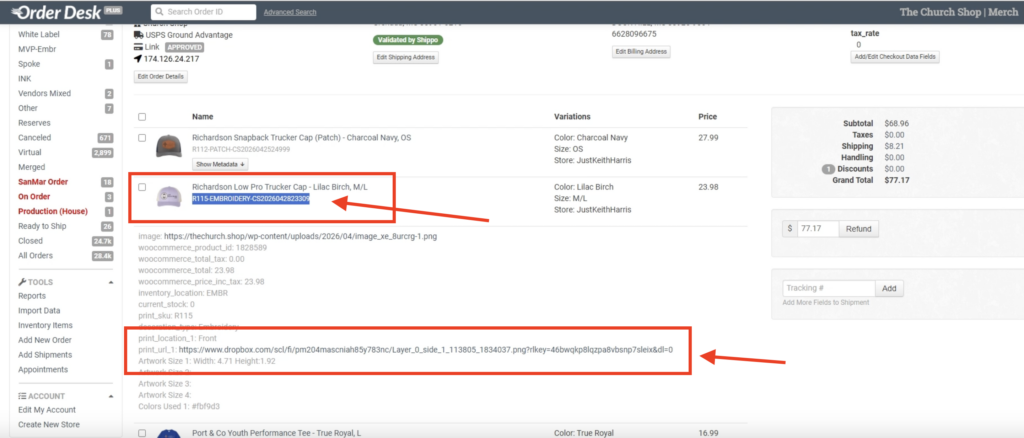
Step 1: Check the details first
Start by confirming the basics: ✅ embroidery size ✅ thread colors
Example:
- 4.7 x 1.9
- Navy
- Lemon Frost
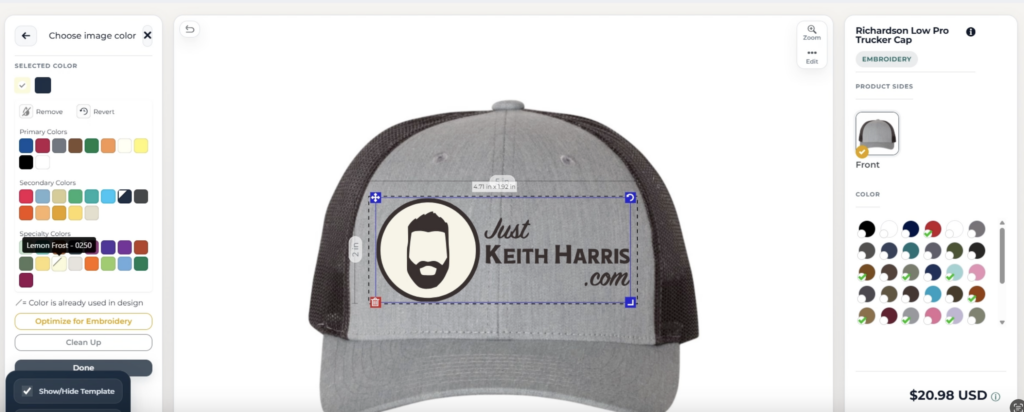
Step 2: Prep your files
Next, save everything you’ll need:
✅ the original PNG
✅ a preview image renamed using the dimensions
Example filename:
- 4.7 x 1.9.png
This is important because digitizer uses the filename itself as the reference for sizing.
Step 3: Upload to StitchVault (SV)
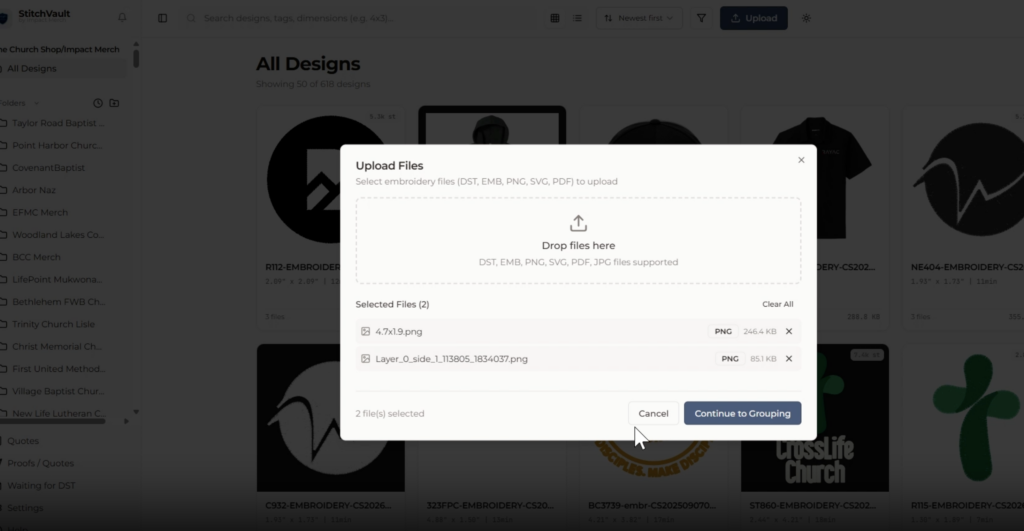
Upload:
- PNG
- Preview image with dimensions
Then:
- Merge
- Replace filename if needed
- Assign to correct church/store
Step 4: Email AJ
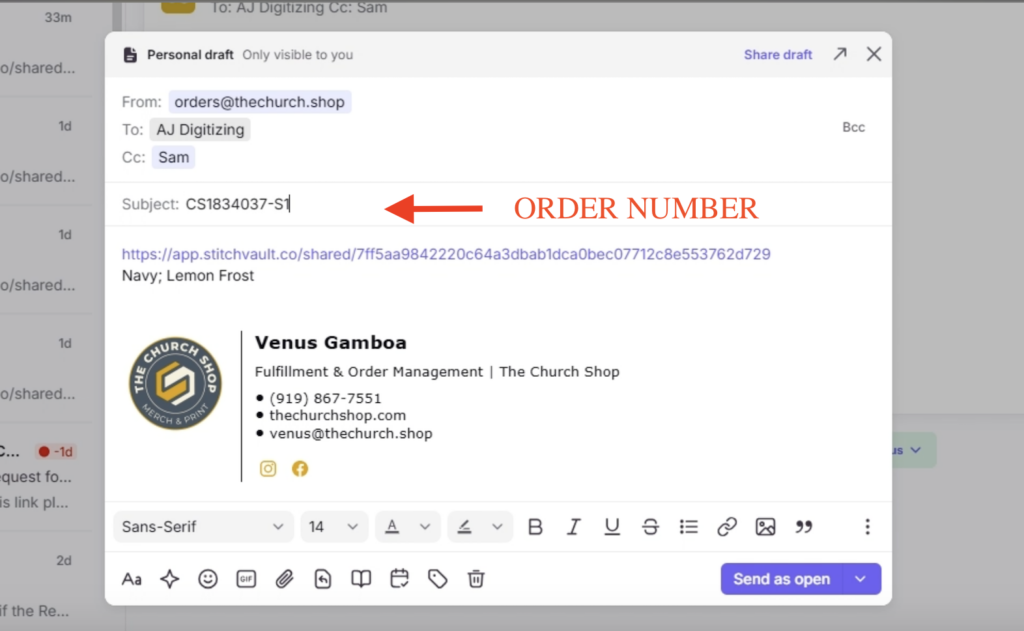
In Front:
- Send using Orders Church email
- CC Sam
Include:
- SV group link
- Thread colors
Subject Line
- Use Order ID.
If multiple EMBR items exist:
- List all under the same email/order number.
Step 5: Update Notes & Inventory
Order Note
Sent to AJInventory
Add:
EMBR filePaste:
- SV group link
Then:
- Save
- Sync inventory