
This guide covers how to properly adjust and test designs for White Label (WLM) files before upload. Follow these steps to ensure dimensions and placements are correct across all designs.
Identify Whitelabel Files
- Some Whitelabel files may show incorrect default dimensions (e.g.,
4200 × 4800 px). - All files must be resized to the recommended WLM size: 14 × 15 inches.
- The design image itself may already look correct, but dimension adjustments are always required to ensure accurate print placement.
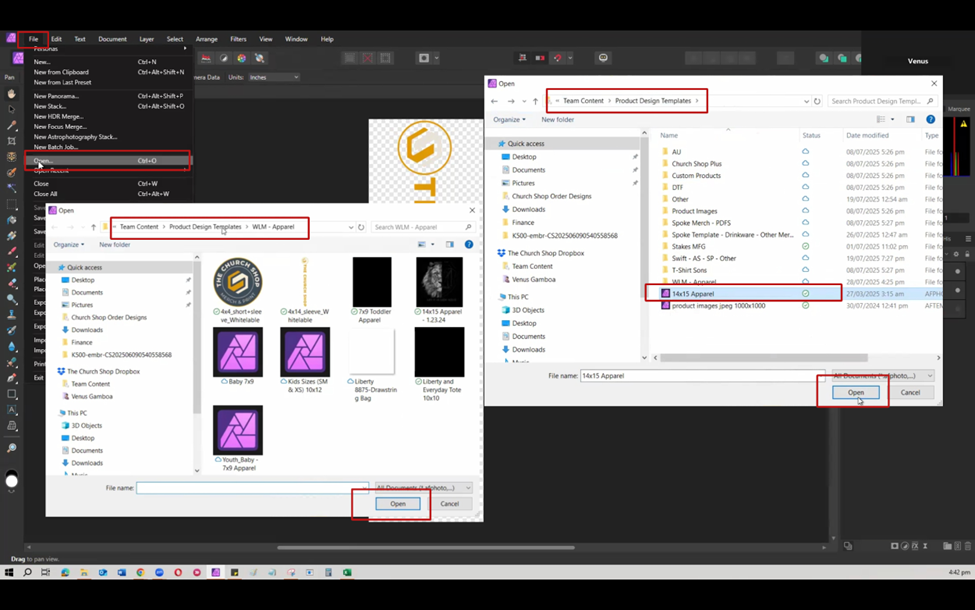
Download and Open the File
- Download the front design from Order Desk.
- Open the file in Affinity Designer.
- Use the WLM Template (14 × 15 inches):
- Path:
Product Design > Templates > Team Content > Product Design Templates - Alternate location:
WLM - Apparelfolder
- Path:

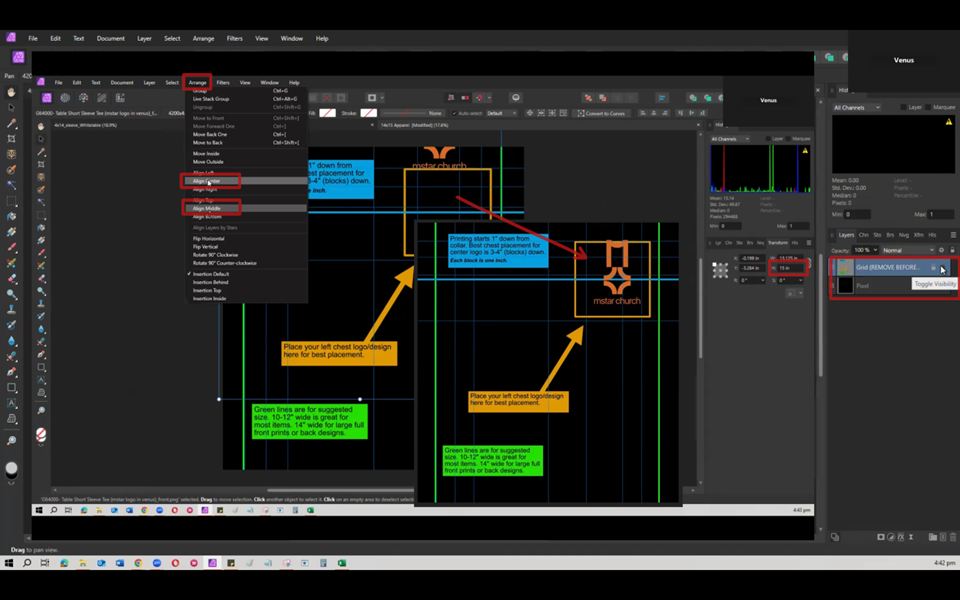
Place and Adjust the Design
- Drag and drop the downloaded design image into the WLM template.
- Check and adjust the dimensions:
- Lock proportions.
- Change height to 15 inches (the width will adjust automatically).
- Center the design:
- Use Align Center and Align Middle in Affinity.
- If needed, make slight placement adjustments (e.g., small shifts left or right) for visual balance.
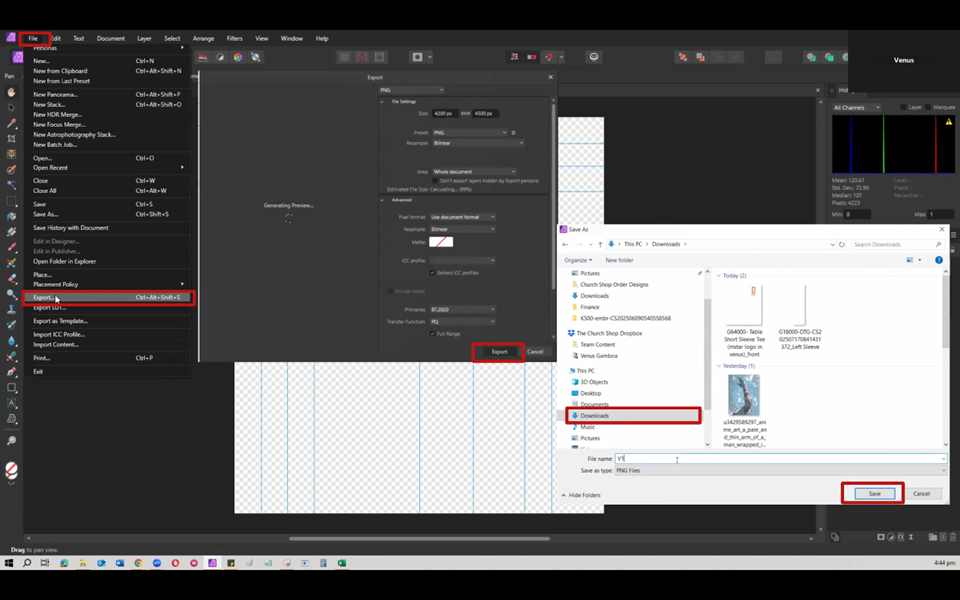
Test the Placement in Designer
- Export the edited file (e.g., save as
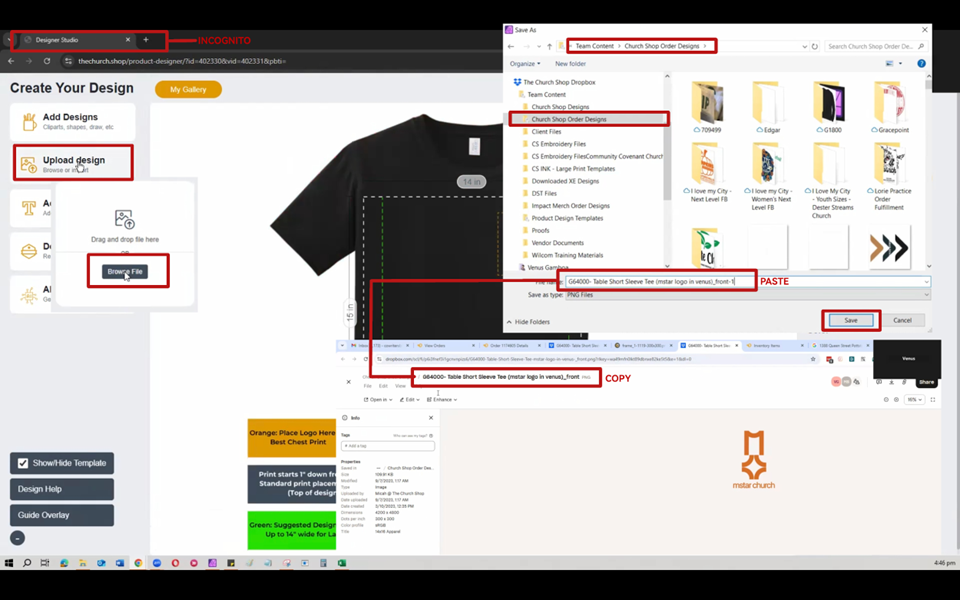
V1in your Downloads folder). - Open Designer in Incognito Mode (to avoid syncing with the TCS dashboard).
- Use your personal email to create a test account.
- ⚠️ Do not add or edit products in the TCS dashboard.
- In Designer, click Add Product → Select the correct SKU (e.g.,
G64000). - Upload your exported design (V1).
- Check the product preview to ensure the placement looks correct.
Make Adjustments if Needed
- If the placement appears off:
- Return to Affinity Designer.
- Slightly adjust the design (e.g., nudge to the right).
- Save as a new version (e.g.,
V2). - Re-upload in Designer and review again.
- Repeat this process until the placement looks correct in the preview.
Finalize the Correct Version
- Once you’ve confirmed proper placement, export the final version (e.g.,
V2). - Upload the final file to the Church Shop Design Folder.
- Rename the file clearly to indicate:
- Example:
Front (WLM) – V2orFront (WLM) – Final.
- Example:
Apply the Same Process to the Back Design
- If the item includes a back print, repeat the same process for the back design.
- Ensure consistent 14 × 15 sizing and centered placement for both sides.
Notes & Reminders
- Always use the 14 × 15 WLM template — no exceptions.
- Always lock proportions when resizing.
- Double-check placement in Designer before finalizing.
- Avoid adding or editing products in the TCS dashboard during testing.
- Save multiple versions (
V1,V2, etc.) for easy tracking and comparison.