
This outlines how to handle one-off or special requests from Micah or other team leads.
These orders are not placed through a client’s shop or normal checkout process but instead, they’re manually created inside Order Desk for individual customers.
Background
- Custom or one-off orders are typically for customers who:
- Don’t have a storefront with us, or
- Want to place a direct order outside of the normal workflow.
- These are created manually in Order Desk, using details provided by Micah (or the assigned lead).
- The goal is to replicate a full, trackable order with all files and previews added manually.
Steps to Create a Custom Order
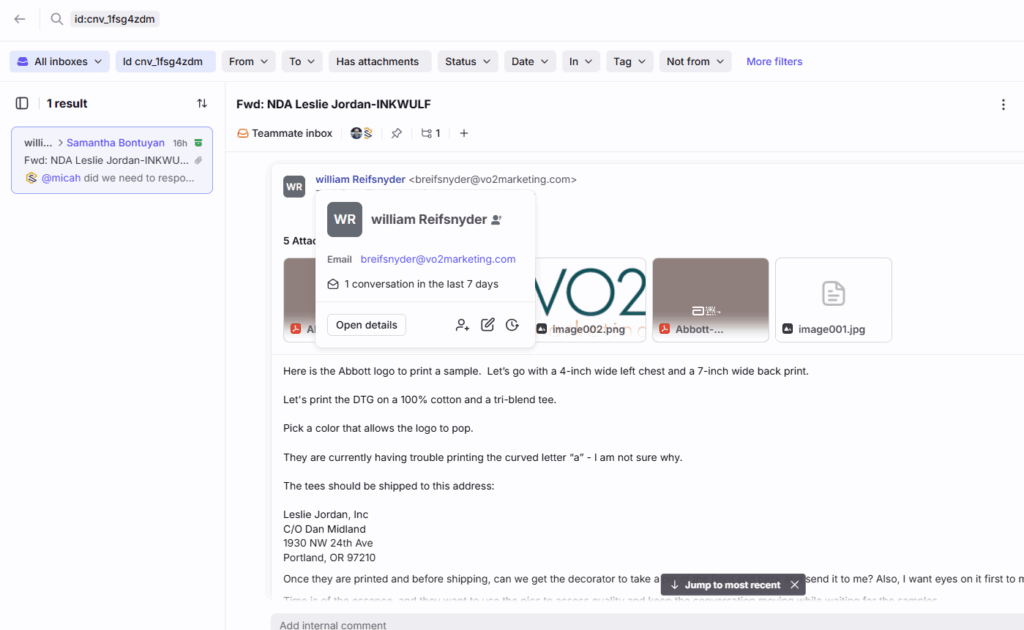
1. Gather Customer Details
From Micah’s email, collect:
- Full name (first and last) (of the client)
- Email address
- Shipping address
- Garment type(s), colors, sizes, and quantities
- Print dimensions or placement details
- Dropbox link(s) to design files
💡 Tip: Copy and summarize all key details into a notepad or comment section for easy reference during setup.
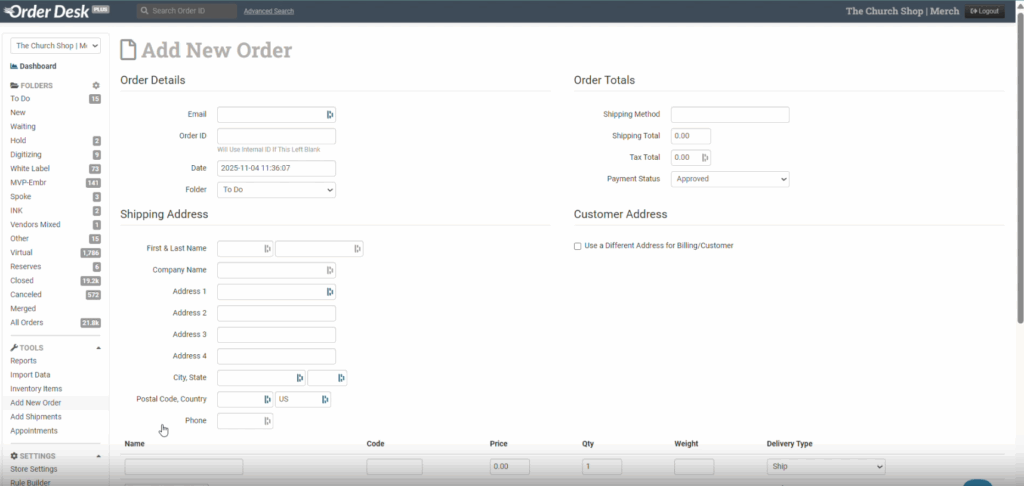
2. Create the Order in Order Desk
- Go to Order Desk → Add New Order
- Fill in the following:
- Customer Info: Name, email, and shipping address
- Notes/Comments: Add summarized order details from Mica’s email
- Order Folder: Usually set to
Waiting - Shipping Method: Confirm with Micah; default is
Standard - Return Address: Use Church Shop’s address for return-to-sender handling
- Order ID: Auto-fills unless a custom ID is provided by Micah
3. Add Products / Items
There are two options:
| Option | When to Use | How To Do It |
|---|---|---|
| A. Add Print-On-Demand Item (Quickest) | When you don’t need a preview image | Use “Add Item → Print On Demand → Custom SKU.” Paste the Dropbox print link. |
| B. Add from Catalog (Recommended) | When you want image previews & SKU tracking | Select from Catalog → Add Item and enter the product title, SKU, and details. |
⚠️ If creating from catalog, you’ll also have access to the inventory entry where you can attach image reviews manually.
4. Attach Design Files
- Go to XE → Products → Decorated
- Search for the full SKU and download design files
- Save files to Dropbox under the correct folder
- If Dropbox syncs slowly or errors occur, click the Dropbox icon to re-sync manually
- Double-check that each file matches the correct variant (front/back and garment type)
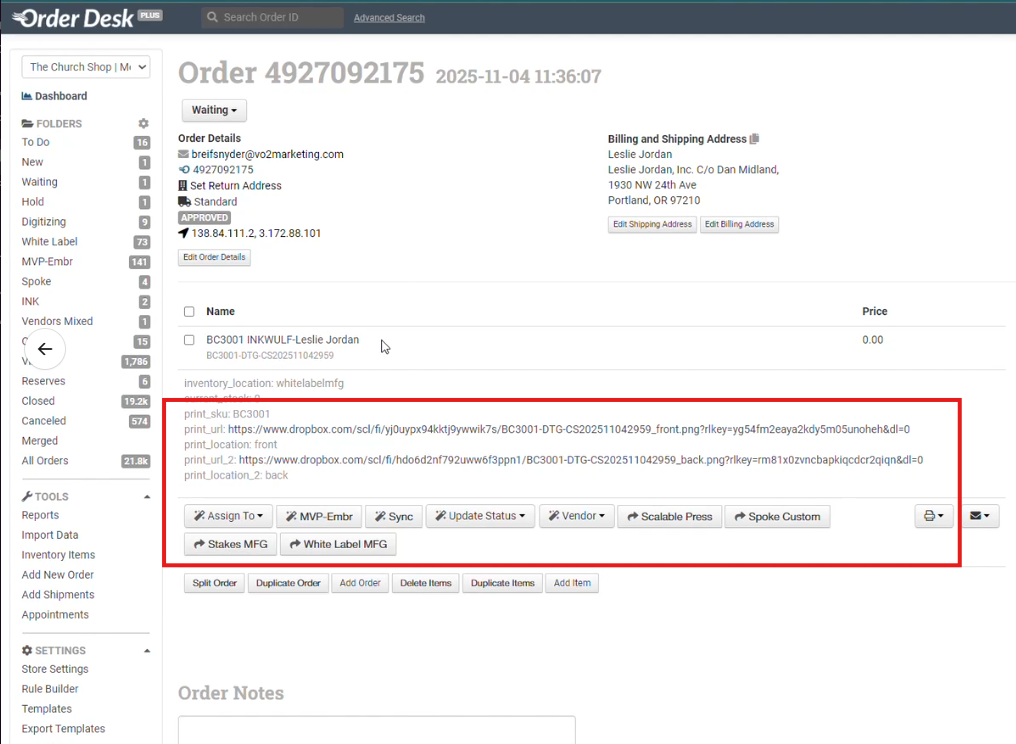
5. Add Image Reviews Manually
Because this order doesn’t come from WordPress, it won’t auto-sync preview images.
To fix this:
- In Order Desk → Inventory → Search for the product by SKU or title
- Click the item and upload:
- Front Image URL
- Back Image URL
- Save changes
- Return to the order → click Sync
- Confirm images appear under metadata (they’ll show at the bottom of the item list)
6. Review and Complete Order Setup
- Double-check color, size, and spelling of item names.
- Verify correct image previews and Dropbox file links.
- Ensure return address and shipping method are filled.
- For samples or test prints, confirm with Mica which garment type to use if colors differ (e.g., “Vintage Black” instead of “Black”).
- Add front/back print links in comments for clarity.
7. Submit for Review
Once all items and files are verified:
- Leave the order under Waiting status.
- Notify Micah for review before proceeding with fulfillment.
| Field | Description / Action | Notes / Example |
|---|---|---|
| Customer Info | Full name, email, shipping address | Copy directly from Micah’s email |
| Order Folder | Determines workflow stage | Use “Waiting” until reviewed |
| Shipping Method | Delivery option | Confirm with Micah |
| Return Address | Default to Church Shop | Ensures return-to-sender is handled |
| Product Title | Descriptive name of item | e.g., “BC3001 – Black Tee” |
| SKU | Product identifier | Use exact SKU from XE |
| Design Files | Front and back artwork | Store in Dropbox and link |
| Image Review URLs | Product preview images | Manually added via Inventory |
| Comments | Summary of print details | Include color, size, notes |
| Order Status | “Waiting” until approved | Then move to production queue |
❓ FAQ
Q: Why don’t image previews show automatically?
A: Manual orders aren’t synced from WordPress, so previews must be added manually via the inventory item.
Q: What if Mica doesn’t provide a shipping method?
A: Default to Standard, unless she specifies otherwise.
Q: What folder should the order stay in until approval?
A: Keep it in the Waiting folder until Mica reviews.
Q: What if a color doesn’t match the catalog option?
A: Use the closest available match (e.g., Vintage Black instead of Black) and note this in comments.
You can watch this video for a walkthrough. Creating Custom Order