
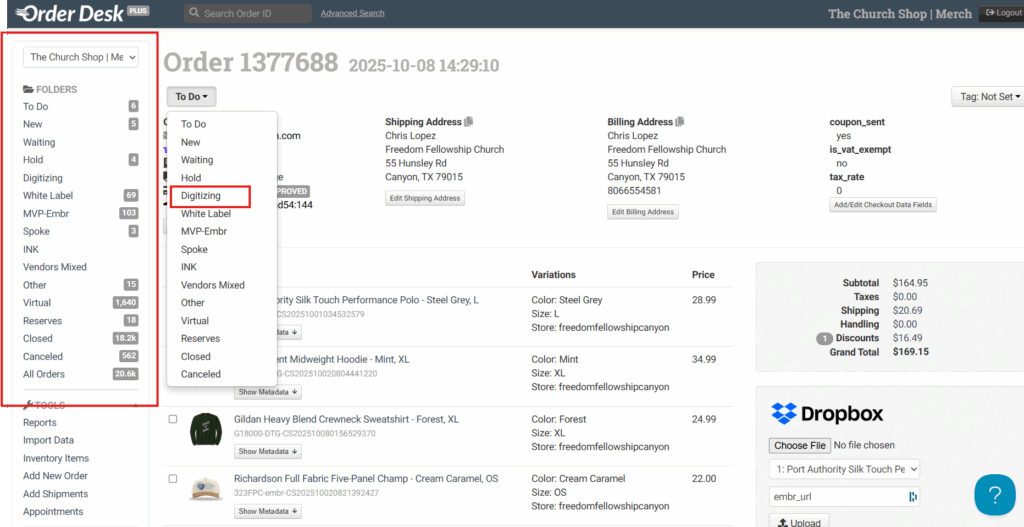
In Order Desk, embroidery files are stored in the Digitizing folder. Everything that’s for embroidery in the To Do or New folder needs to be moved to the Digitizing folder.
Next, access your XE. There are three things we need to submit to MVP:
- The production worksheet
- The PNG file
- The SVG file
To do this, go to Production Hub in XE, then navigate to Orders. Copy the order number from Order Desk and paste it here.
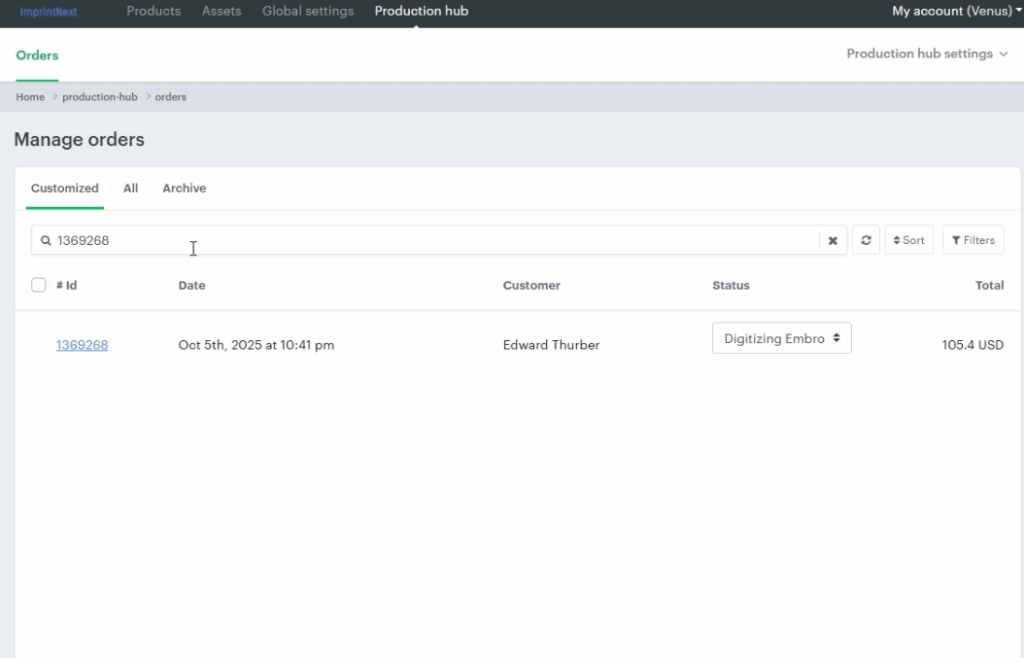
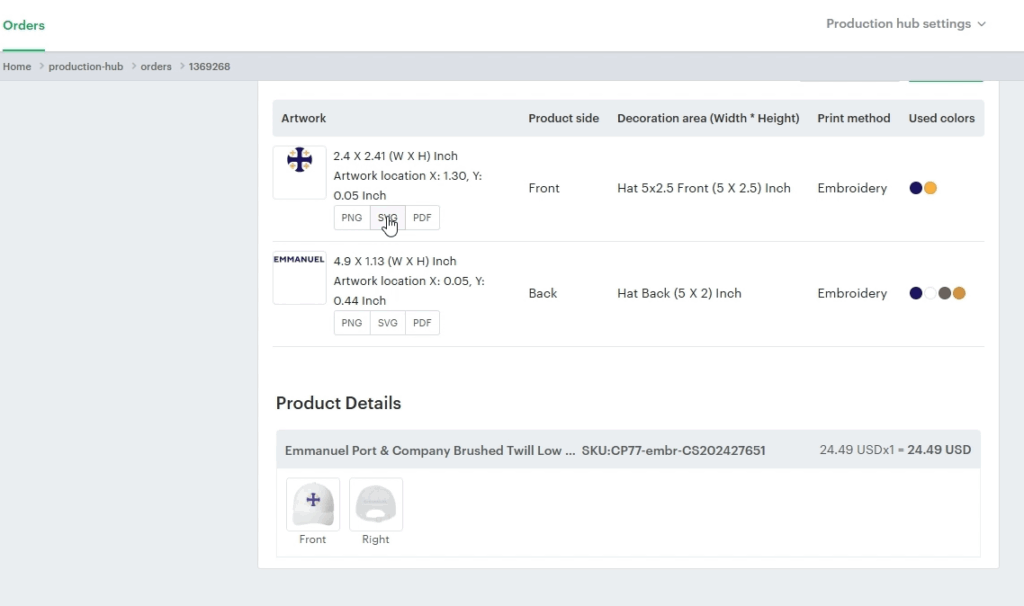
Click on the order and scroll down. From there, check the product in the order and download both the PNG and SVG versions.
Access ES, then drag the PNG file here.
Click Prepare Bitmap Colors > Smart Design. This will display the colors used in the PNG file.
Then click Add Bitmap Colors to Palette.
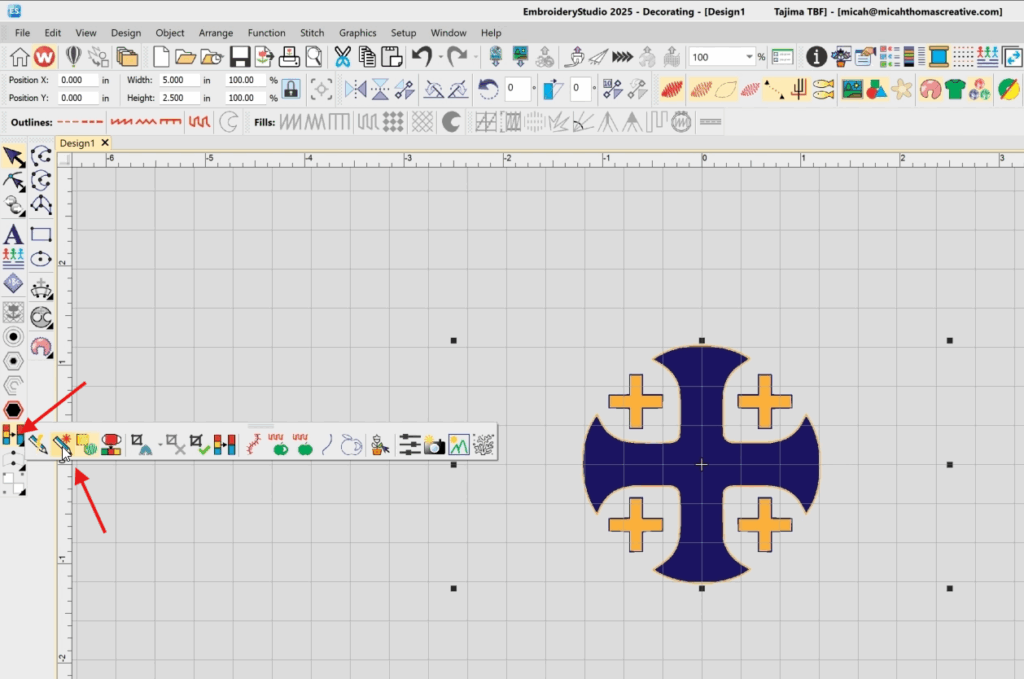
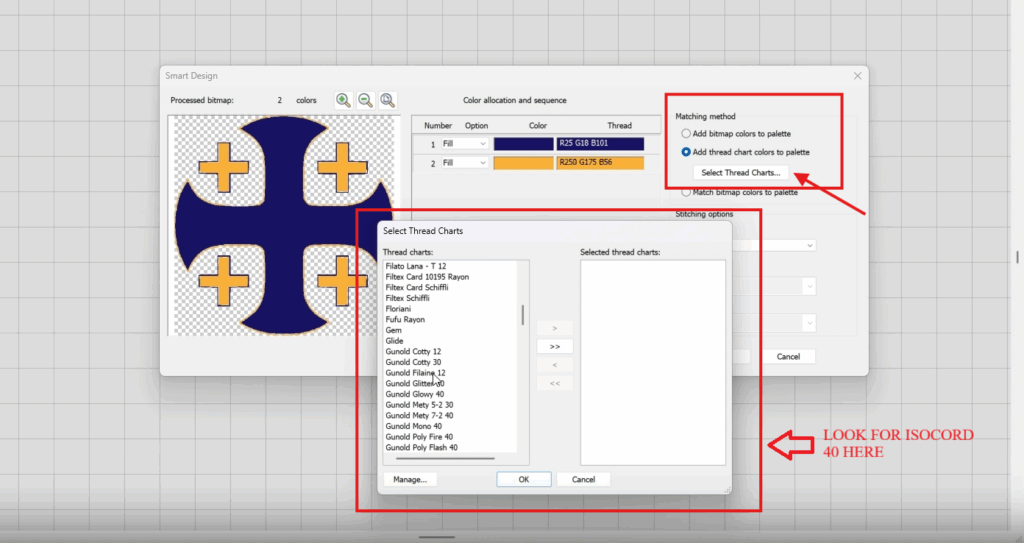
Under Matching Method, check the box
Add Thread, then select Thread Charts.
Choose Isocord 40, and click OK.
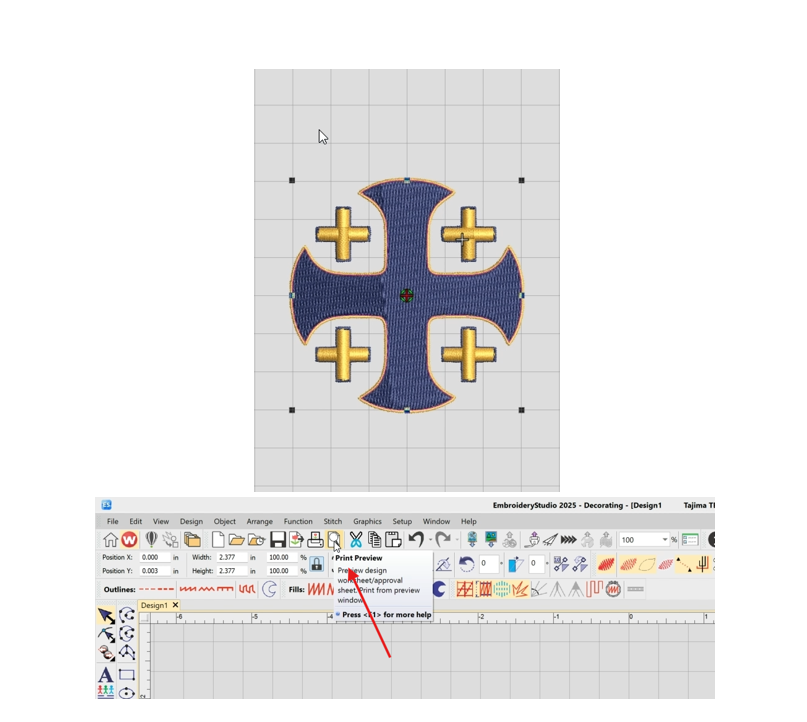
Once done, it will look like thread. Next, we generate the production worksheet by clicking on Print Preview.
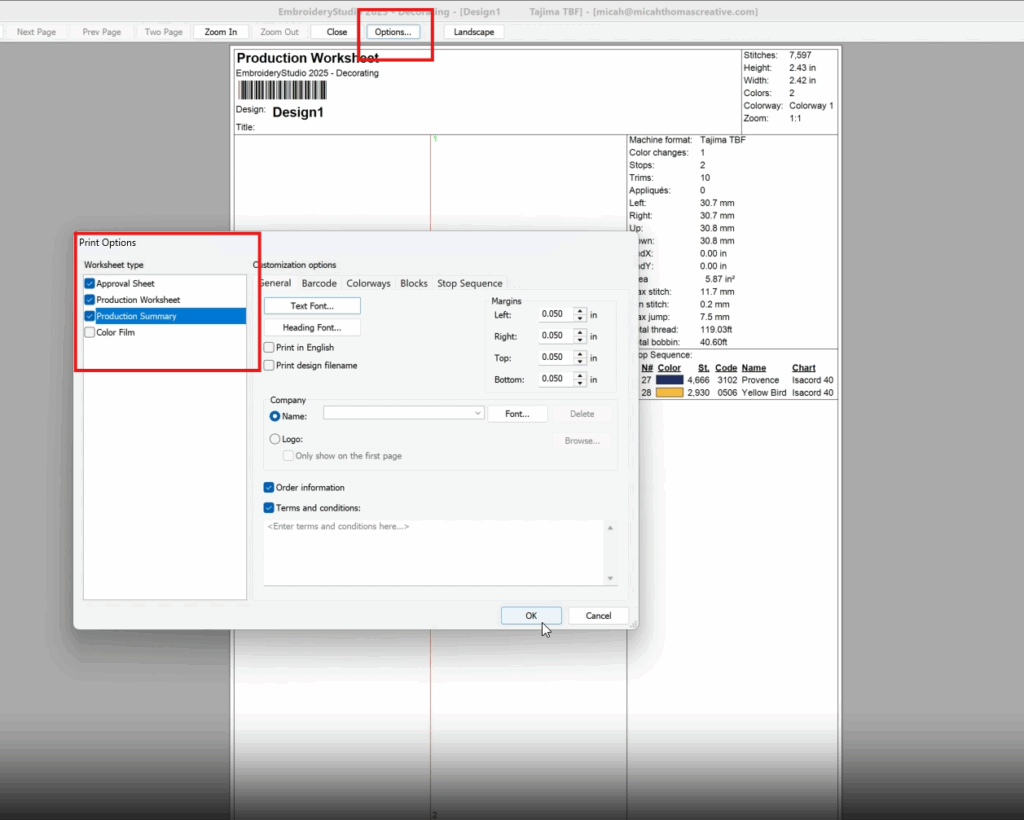
From clicking the Print Preview, click Next to open the options. It will show the Print Options, where you need to select Approval Sheet, Production Worksheet, and Production Summary.
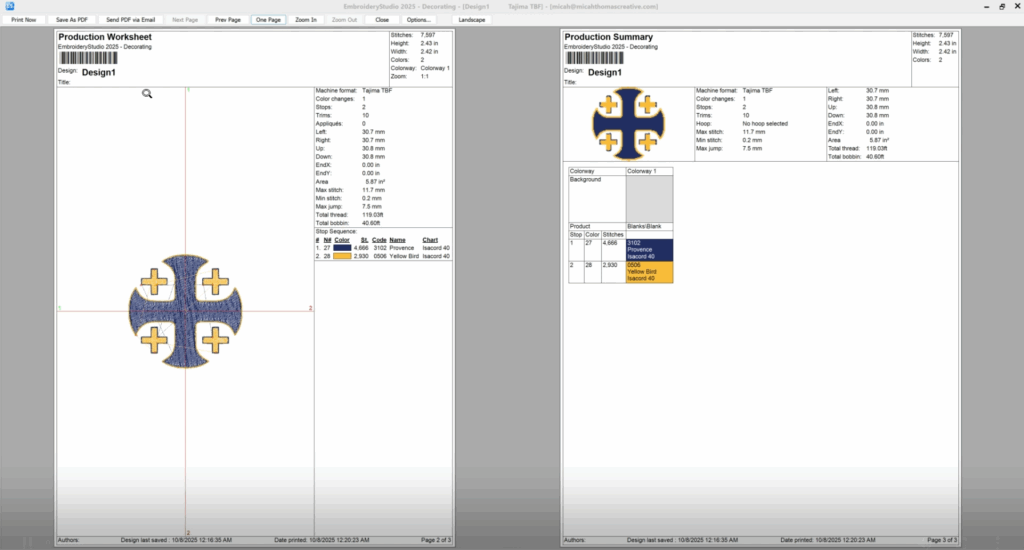
Now this is going to be the production worksheet. Just save it as a PDF. There is a specific Dropbox intended for EMBR; it’s called CS Embroidery Files. Within that folder are the names of the churches. Upload the PNG, SVG and the Production Worksheet.
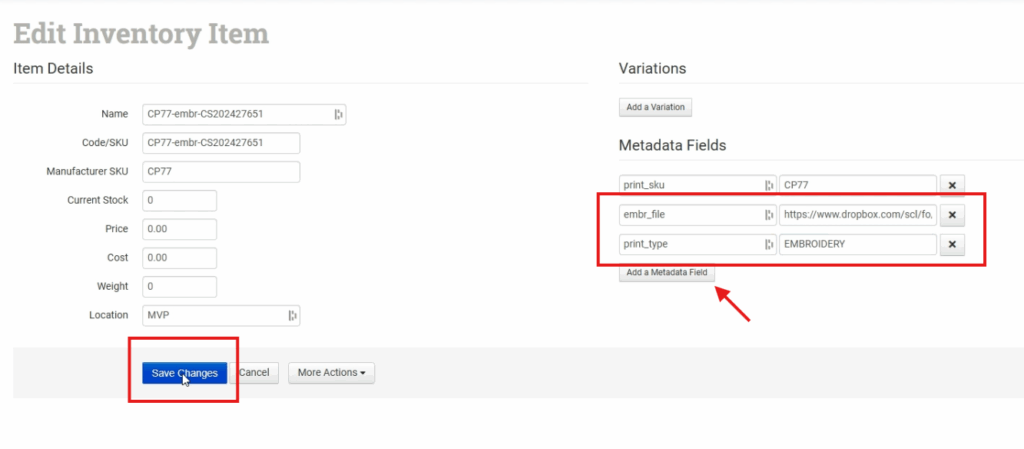
Then go to Edit Inventory Item and proceed with entering the necessary details. To search for an item, use the product SKU. For the location, it should be MVP as they are the vendor. Then click Save Changes.
Watch this walkthrough for further details.