
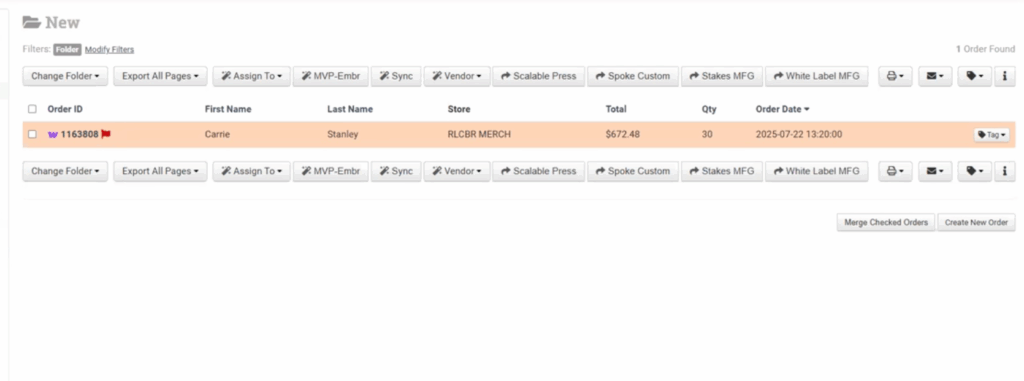
A VIP Order is any order with a total value of $500 or more. These are automatically flagged as VIP and often highlighted in red within the system.
Key Rules:
- All items in a VIP order must be sent to the same vendor.
- If the order includes mixed product types (e.g., shirts, embroidery, drinkware, etc.), it should be split by product type.
- Only uniform product type orders (e.g., all shirts) qualify as valid VIP orders.
Verifying the Order
Before processing, verify that the order meets the VIP criteria.
Steps:
- Confirm Product Type
- Ensure all items are the same type (e.g., all shirts).
- No embroidery, drinkware, notebooks, or stickers should be included.
- If all items are consistent → proceed to next step.
- Confirm Order Details
- Open Xe (Inventory System).
- Use Sync Item Details & Inventories to ensure the data is up to date before continuing.
Design Verification (SKU-Level Checks)
For each SKU in the order:
✅ Verify front and back design files are present and correct.
✅ Check color accuracy (e.g., all white if required).
✅ Confirm resolution — design should not appear pixelated or blurry.
✅ Ensure print placement names are accurate and consistently formatted.
Examples:
- SKU 516345 – Front and Back Checked
- Issue: Back design had black areas that should be white.
- Solution: Apply layer correction using Affinity (see Workflow section).
- SKU 3912 – Placement Mislabeled
- Issue: Label showed “Back” instead of “Left Sleeve.”
- Correction: Change to “Left Sleeve” (capitalize first letters).
- Verify: Short sleeve print area should measure 12×12.
- SKU 13990 – Front Only
- Result: All white, correct placement, no issues found.
Fixing Design Issues (Affinity Workflow)
When minor design fixes are needed:
- Download the design file from the inventory system.
- Open the file in Affinity Designer with the black background grid enabled.
- Adjust Design:
- Go to Layer Effects → Color Overlay.
- Apply white (CMYK all 0) to remove unwanted black outlines or areas.
- Save Updated Design:
- Rename with versioning, e.g.,
filename_v1orfilename_updated.
- Rename with versioning, e.g.,
- Upload to Dropbox and copy the new shareable link.
- Replace the old design link in the inventory with the new one.
- Sync Inventory again to apply all changes.
. Final Checks Before Processing
Before sending to White Label, confirm the following:
- 🧾 Colors & Sizes: Complete and accurate.
- 💲 Pricing: Matches system values (auto-calculated).
- 📦 Shipping Details: Verify address and any client notes.
- 🏷️ Inventory Names: Proper capitalization and location format.
- 👀 Preview: Re-run preview to confirm all updates and fixes are visible.
Sending VIP Orders to White Label
Once verified and finalized:
- Click Send to White Label.
- In the dropdown, choose VIP → WLM Team.
- Update the recipient to Jennifer (White Label contact).
- Review the auto-generated email preview.
- Click Send Email.
Important:
Only use this process for true VIP orders ($500+ and single vendor).
Notes & Reminders
- VIP = $500+, single vendor only.
- Review designs, sizes, colors, placement names, pricing, and shipping before sending.
- Fix design issues using Affinity (layer correction, color overlay).
- Always update design links and sync inventories after edits.
- Send finalized VIP orders to White Label VIP Team (Jennifer) using the correct workflow.
Watch this quick walkthrough.