
This guide explains how to process and verify Spoke sticker orders, including SKU formatting, surface variations, and quality checks before sending to Spoke for fulfillment. Products that are sent to spoke are stickers, magnets and notebooks. If you run into those products, they need to be sent into spoke.
1. Locate the Order
- Open your SKU Sheet and confirm whether the product belongs to Spoke.
- For sticker orders, the SKU may only display the size (e.g.,
4x4). - Next Steps:
- Log into Xe.
- Search for the Order Number.
- Retrieve the complete SKU for verification.
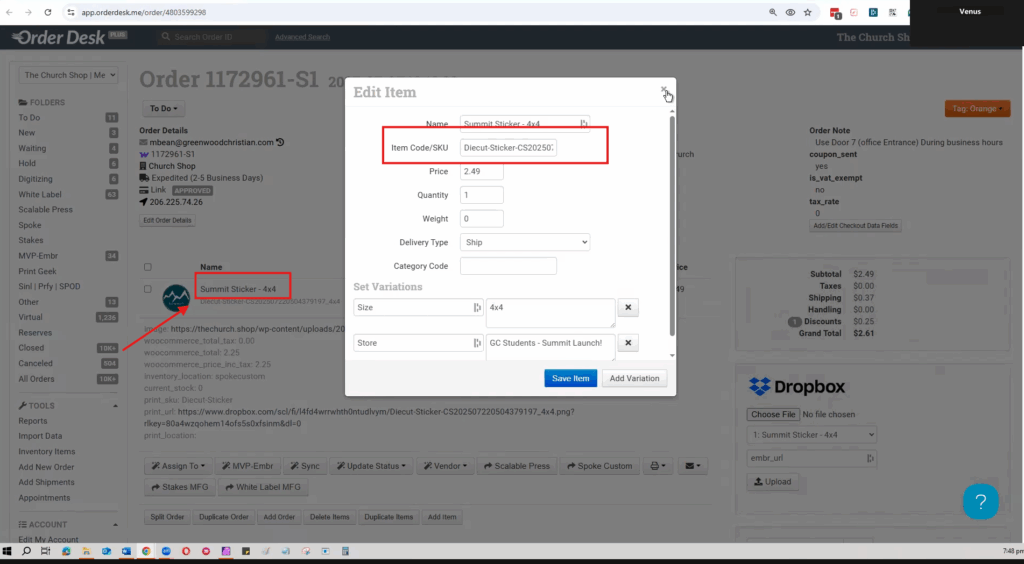
2. Edit the SKU
- Ensure the sticker SKU includes the dimension at the end (e.g.,
4x4). - Replace all underscores (
_) with dashes (-) for consistency across systems.- ✅ Example:
sticker_4x4_white→sticker-4x4-white
- ✅ Example:
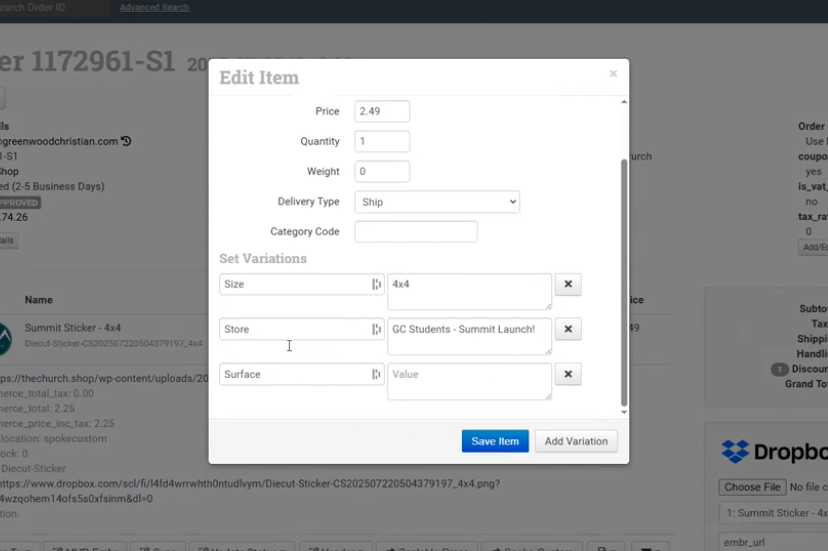
3. Add Surface Variation
All stickers must include a surface variation, which indicates the finish type:
- Clear
- White
How to Check for Surface Variations:
- Copy the SKU (excluding the dimension).
- Go to the All Products Page (same page used for approval checks).
- Paste the SKU in the search bar.
- On the product page, click a size option — the surface variation (Clear/White) will appear.
Always Record:
- Size
- Store
- Surface (Clear/White)
- Price
Verify Metadata
Double-check that all product metadata is correct before proceeding.
- Inventory Location:
Spoke - Print SKU Format:
[size]-[surface](all lowercase)- Example:
4x4-clear
- Example:
- Stickers and magnets both follow this same format.
Review the Design File
- Open the template for stickers or magnets.
- Export and preview the design file to ensure print quality.
Check the following:
- The image is clear (not pixelated, blurry, or stretched).
- Text and small details are legible.
- Slight imperfections may be acceptable (stickers are less strict than garments), but quality must remain professional.
Final Checks
Before sending the order to Spoke, verify all required details:
✅ Print SKU is correct
✅ Inventory location is set to Spoke
✅ Surface variation (Clear/White) is added
✅ Design quality is acceptable
✅ Address is correct
✅ Price is accurate
Send to Spoke
- Send the order to Spoke through the standard process.
- Refresh the page to confirm that the order was successfully sent.
📝 Notes & Reminders
- SKU must include the dimensions at the end.
- Use dashes (
-), not underscores (_), in all SKUs. - Always add a surface variation (Clear or White).
- Double-check all metadata: size, store, surface, and price.
- Ensure Inventory Location = Spoke.
- Verify Print SKU format →
size-surface. - Review design clarity — text and artwork must be readable.
- Confirm address accuracy before sending.
- Make sure the order shows as “Sent to Spoke” after submission.
You can check this link for a quick walkthrough.