
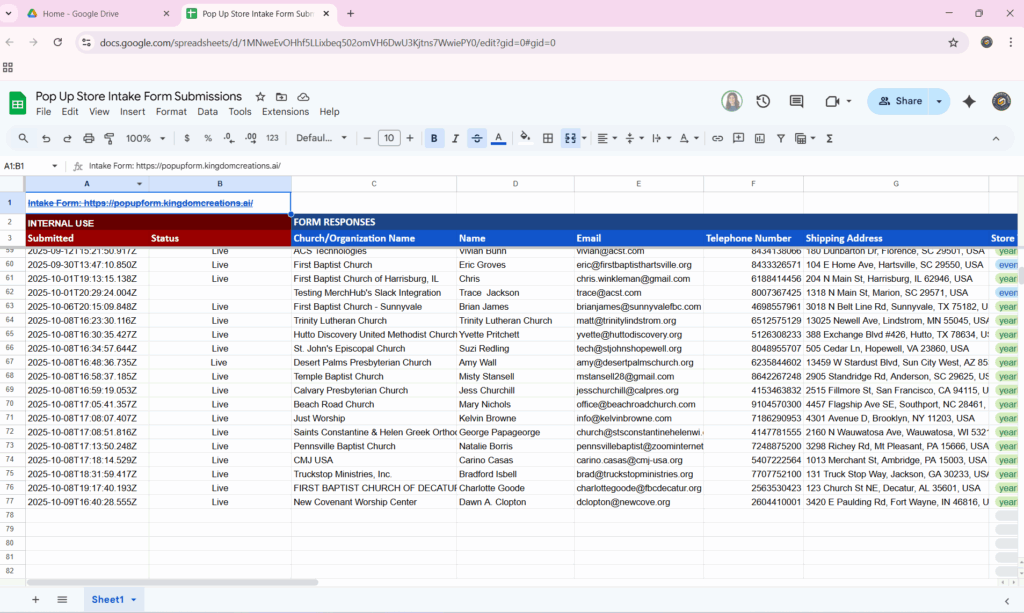
POP-UP STORES are automatically added to this sheet. This form was created and is managed by the ACS team, who also own the sheet. All the necessary details for creating a Pop-Up Store are already included here.
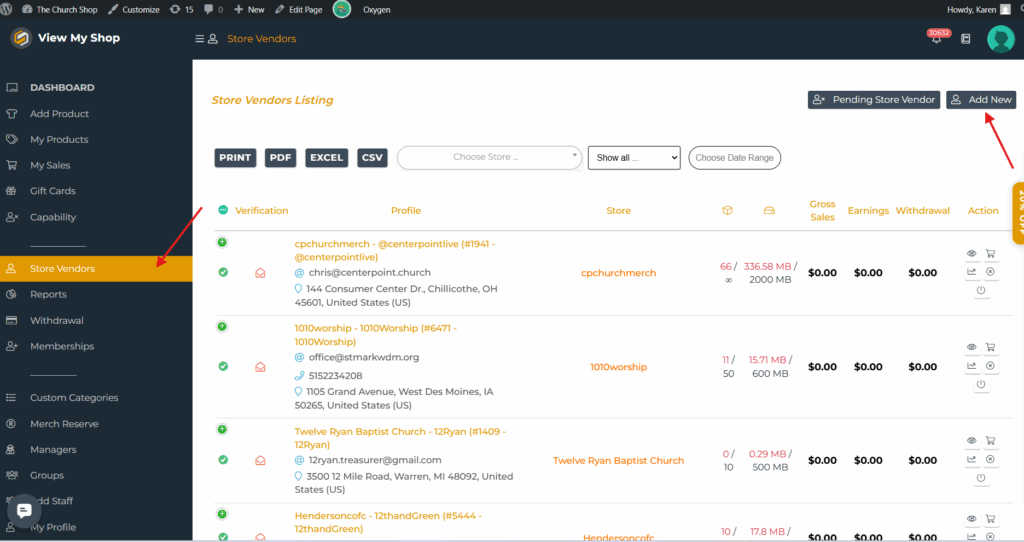
First things first, let’s set up the store for them. We’ll add their products later on. From your dashboard, click on Store Vendors, then select Add New to start creating their store profile.
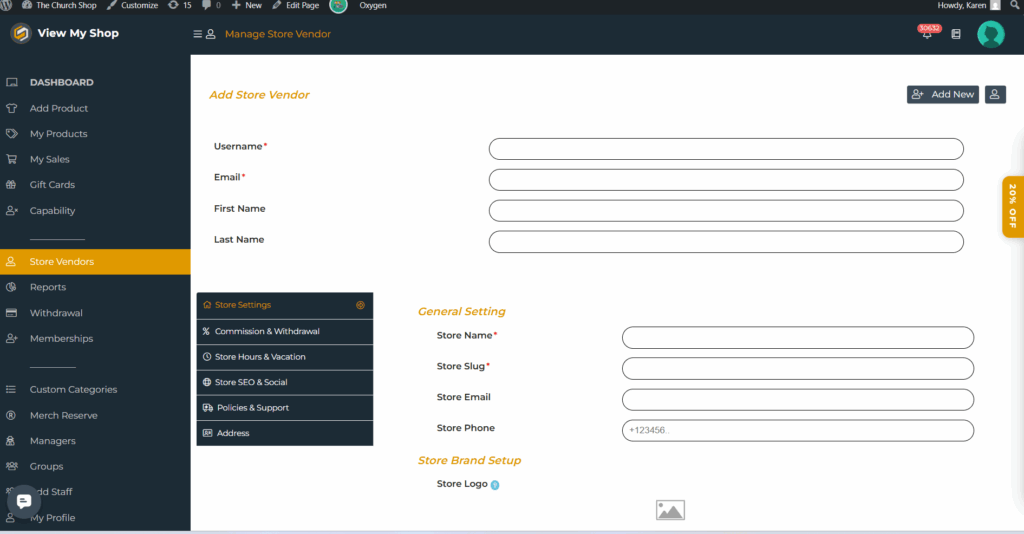
Once clicked, it will take you to this page. Enter all the details from the ACS spreadsheet into the corresponding fields here. Make sure everything matches accurately before saving to avoid any setup issues later on. Don’t forget to hit Submit at the bottom once you’re done to save all the information.
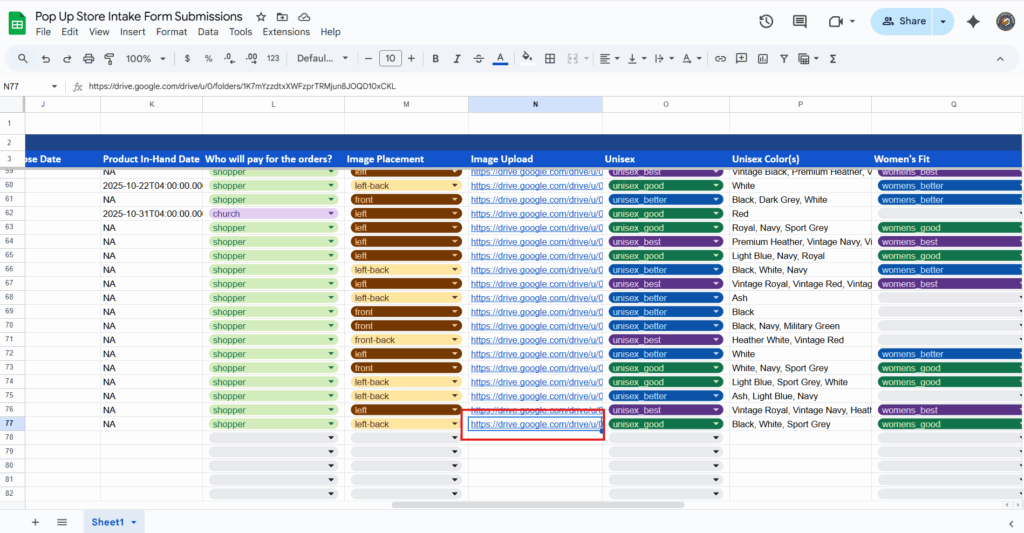
To check the church’s logo that you’ll need to upload while creating the shop, simply download the files from the spreadsheet. Click on the Google Drive link provided and it will take you directly to the folder containing the church’s uploaded files. Make sure to use the correct logo file for consistency across all store listings.
Since we’re done creating the store, the next thing we need to do is create the products for them. Before adding products, make sure you’ve switched to their shop.
You can also check the Pop-Up Shops Guide in the Support Drive for the Good | Better | Best list and related instructions.
Watch this video for a quick walkthrough. Here’s the link